Macrame and Tin Hanging Lanterns
Project time: 20 Minutes
Cost: <$10
Difficulty: Moderate
Materials: Macrame Rope + Tin Cans (or fun container) + Solar Tea Lights or Electric Tea Lights + Beads or Garnishes + Wooden Craft Rings
Finished product: Summer ready hanging lanterns
Use ideas: Summer Patio Decor, Wedding Decor, Backyard BBQ or Party Decor, Balcony or Deck Decor
Note: I do have affiliate links in this post. The links may provide me with a small percentage of commission, but they don’t cost you anything extra.


And babe, don't you know it's a pity
That the days can't be like the nights
In the summer, in the city
In the summer, in the city
I love those lyrics, and didn’t fully understand them until I lived my first NYC Summer. City Summers are what tricks you into staying another long winter! Rooftop parties, outdoor concerts, all day park picnics, sidewalk brunch, beer garden afternoons, and of course; late night pondering on the fire escape. One of the best things about city Summer nights are the variety of lights always giving a romantic, atmospheric backdrop for whatever you’re up to! Whether it’s the skyline, streetlights, cafe lights, or windows, there’s always some cozy atmosphere shining graciously for you.
One of the first things I did when we first got our suburban back yard was put up some string lights! (Our neighborhood was in dire need of twinkling.) Since that first strand we’ve kept the yard evolving, and this Summer I decided try some macrame hanging lanterns from our little oak.
They are super simple to make, give the perfect cozy glow, and I love the texture of the ropes blending with the greens and woods outside!
Here’s what I did:
1) Prep your cans (or container of your choice.)
I love the look of tin metal, it rusts nicely over time, super low maintenance, and cheap to replace (if you repurpose soup cans! I did use soup cans by the way.) I hammered some drainage holes in the bottom so I can leave these outside and not worry about rain water storing up. Then hammered a few more for extra light to shine through. Tip: If you freeze water in your clean empty cans, you can hammer holes and not bend the tin in the process.

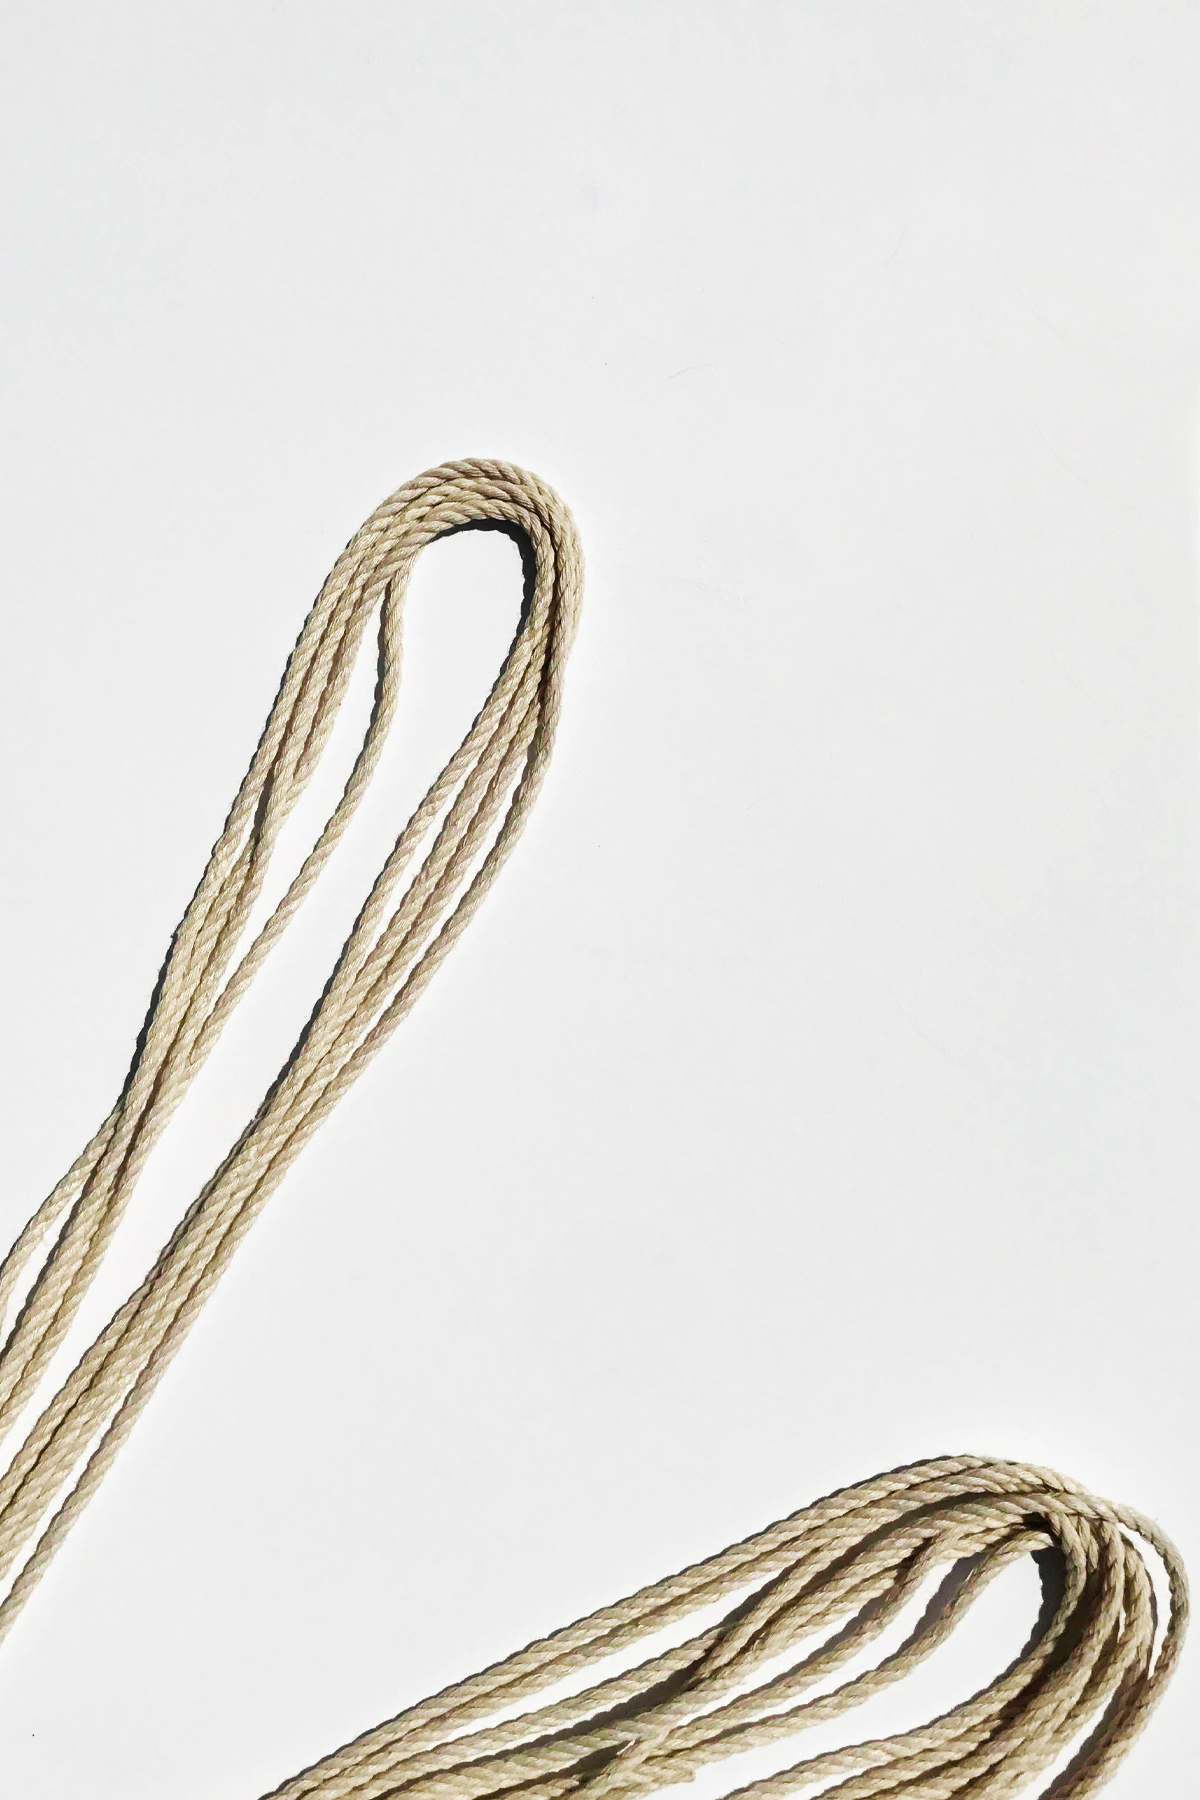
2) Cut your cord into 4 individual strands. Mine were approximately 7 feet long because I liked the extra long tail.

3) Fold your cords over to create 8 strands, now they should be approximately 3.5 feet. Gather your looped ends evenly at the top, and trim the ends off the bottom so they are equal lengths.
4) Gather all of your strings thorough the wooden ring, and pull into a knot. Tip: If you are getting bumps in the knot, pull each string through individually, this will help the knot stay even.

5) Separate your 8 strings into groups of two, (four groups total) and string your beads or garnishes together on the two strings. I used plain wooden craft beads, and taped the bottom of the two strings together for easy stringing.


6) Tie a knot under the bead using the same string group you threaded. I tied my first knots approximately 8 inches down from the ring. Be sure all your knots and beads are sitting in an even row horizontally.
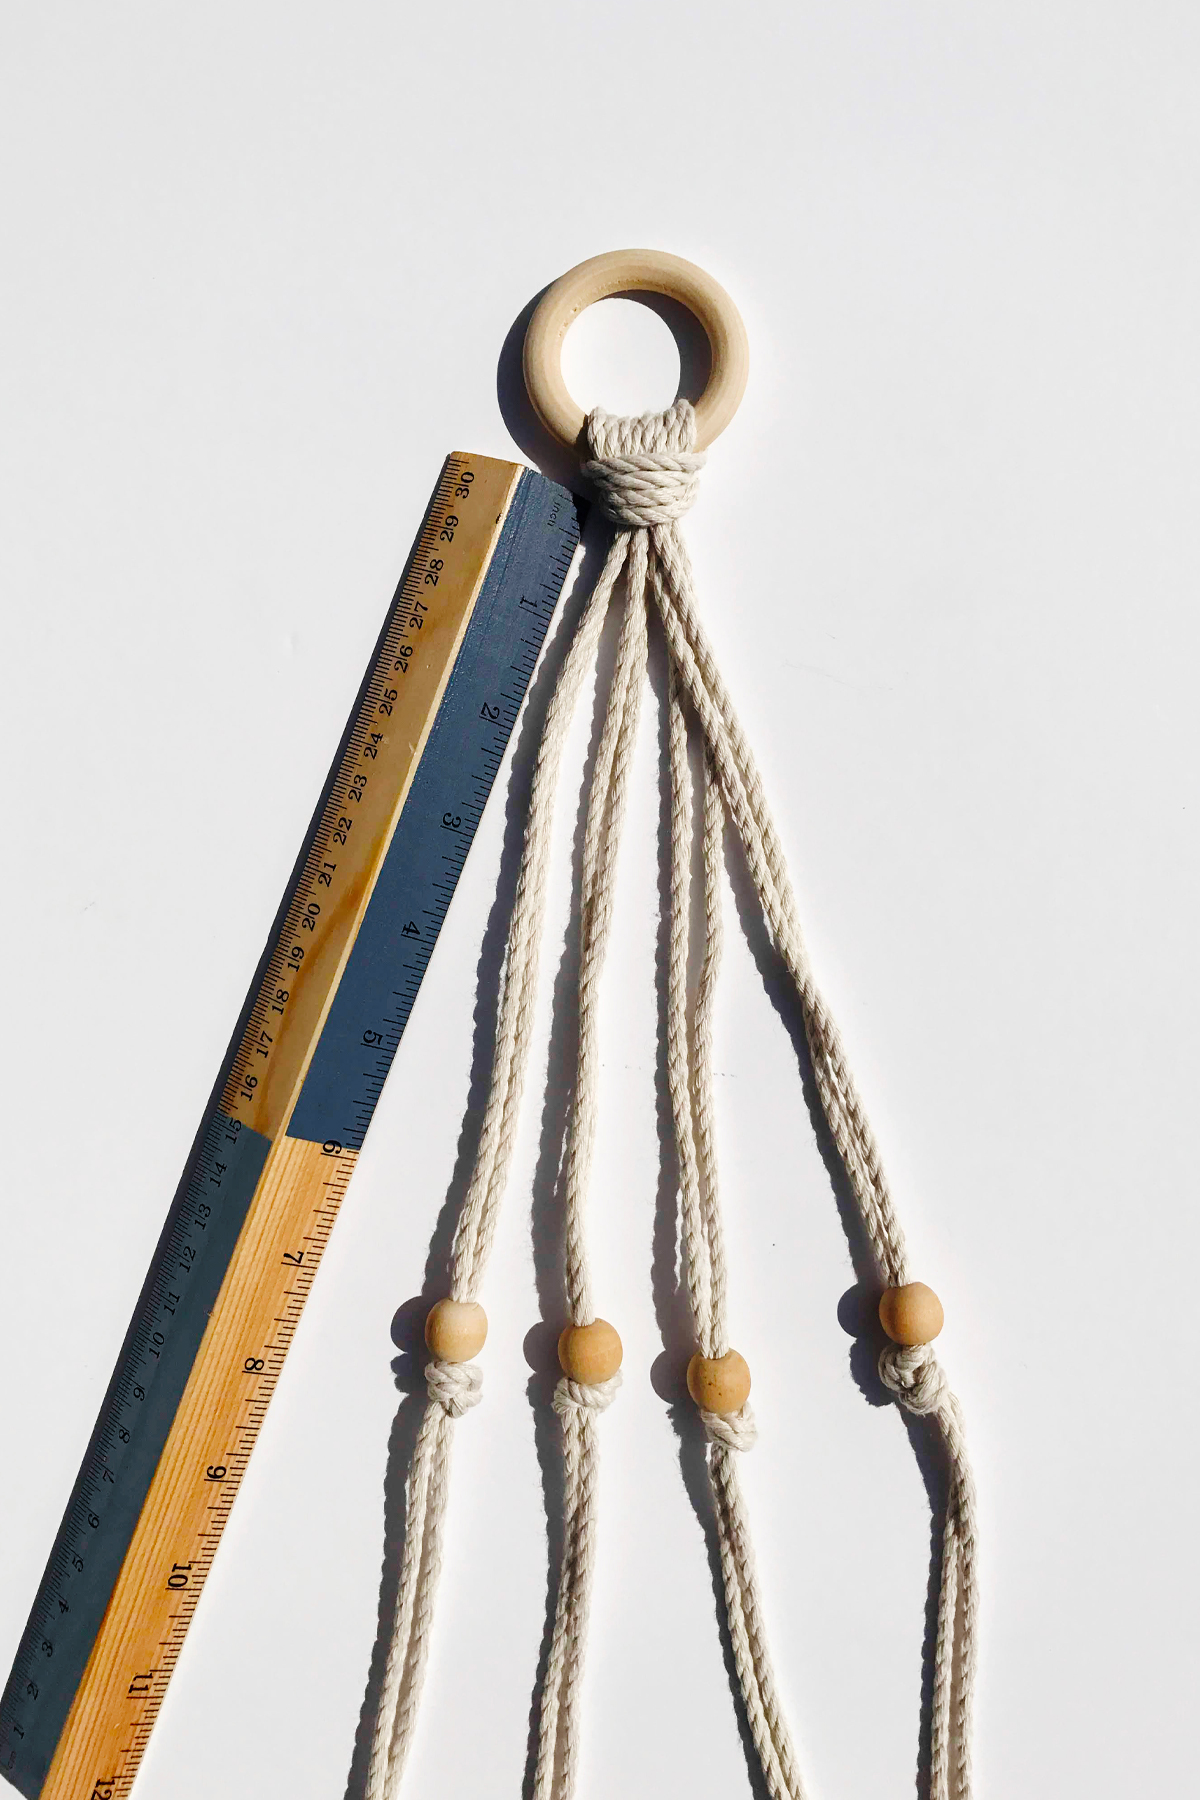
7) Join your string groups together by tying the left string in a knot with the next groups right string. My knots were another 4 inches down. Complete your group ‘circle’ by joining the last groups right string to the left string of the first group.


8) Gather all strings into a large knot to finish the ‘holder’ portion. This final large knot was another 4 inches down.
9) Trim the bottom tails to hang evenly.

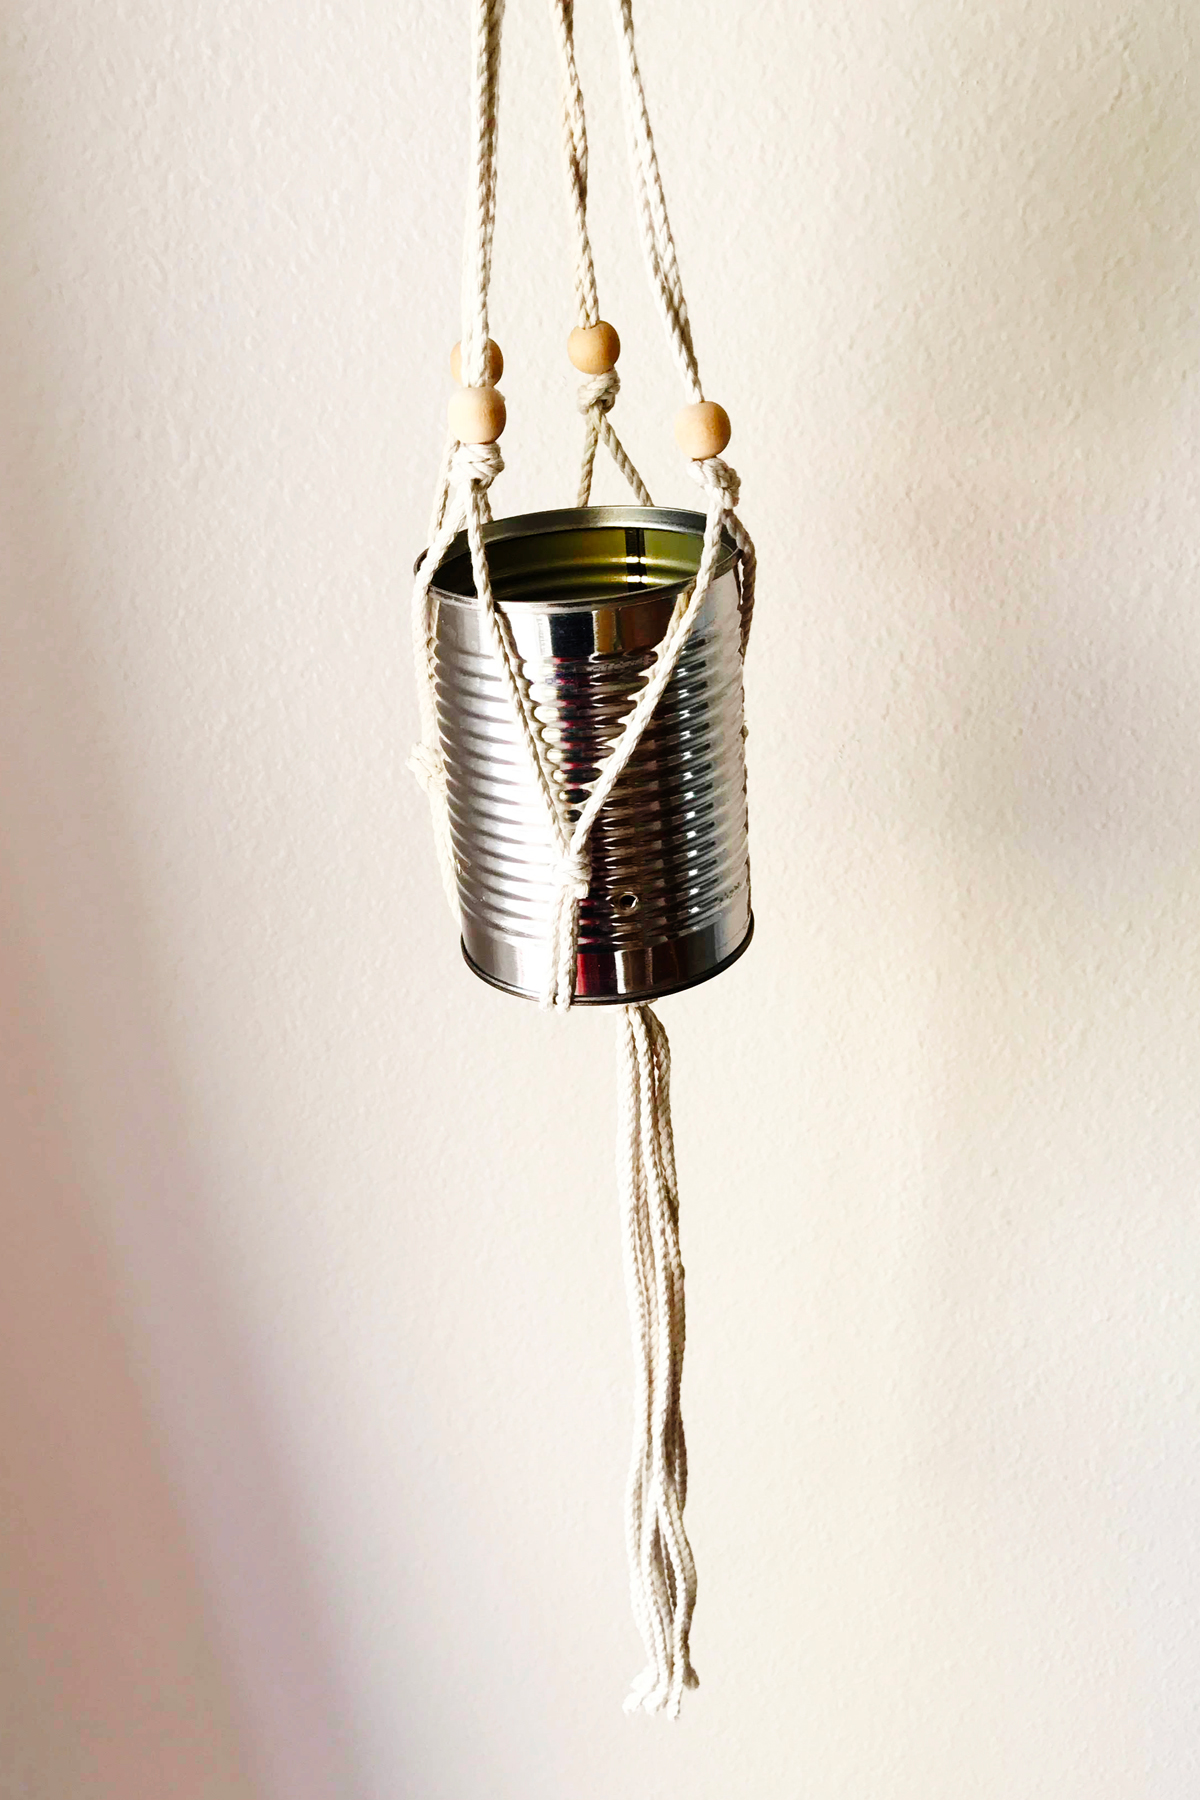
10) Add your can or holder, candle of choice, and hang it where some twinkle is needed! And whoo hoo! Cozy, summer lights just for you. I used solar candles because my lights are in a sunny spot, and I’m a fan of automation. Note: I’d suggest using electric candles or solar with these, just because the macrame rope holder could easily become a fire hazard if you’re using an actual flame.


Notes:
- As always, if you try this project I'd love to see your result! Please share a pic and tag us on instagram, @somanyhoorays #naileditsomanyhoorays or on the So Many Hoorays facebook page