Free Printable: Minimal Advent Calendar
Project time: 1 Hour
Cost: > $5
Difficulty: Moderate
Materials: Free Simple Advent Calendar Printable + String + Mini Clothes Pins + Scissors + Glue
Finished product: An adorable advent calendar suggesting fun, unique event ideas for the 25 days leading up to Christmas.
Use ideas: 25 Day count down until Christmas + Family advent calendar + Couple’s advent calendar
IT IS HERE! I’m proudly one of those annoying Christmas people. When I was 10 I wrapped everything in my room in wrapping paper, it was a new Christmas decorating thing I was trying. Kind of crazy? Yes. Equally awesome? Double yes.
The thing I like most about Christmas, (besides Jesus coming to save the world, obviously.) is the general feeling of unity among mankind. The year is coming to an end, and no matter what different things we’ve individually been through, for a few fleeting moments, we’re all in it together. Cheesy maybe, but it makes the world feel small and cozy.
Let’s face it, there are a LOT of fun Christmas things. It’s easy to over-plan the month and simultaneously feel like you didn’t do anything you really wanted to do!
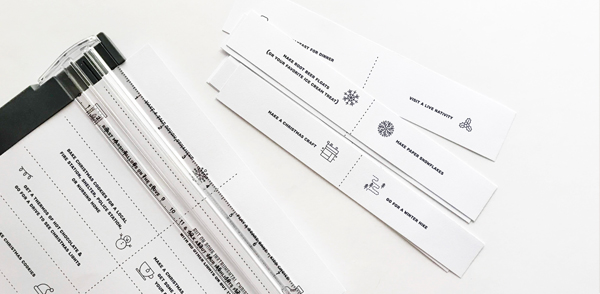
I’m all about intentionality, and I love advent calendars for that reason. I made this simple advent printable, 25 easy to fold envelopes and 30 event cards to choose from. Open one up each day, and enjoy the moment you create!
Directions:
1) Print the free advent calendar kit (Envelopes + event cards)
The printable consists of 25 foldable envelopes and 30 event cards. The first 8 pages of the printable are the envelopes, if you’re looking to print the event cards only, (to use with your own advent calendar etc.) set your printer to print pages 9 - 11.
2) Cut out the envelopes + event cards
Follow the dotted line! There are 25, this can become tedious. Employee crafty friends, keep them energized with chocolate. Employee your kids, it’s not child labor if it’s Christmas crafts.
3) Fold and glue the envelopes
Fold the wings, pocket, and lip of the envelope towards the inside, with the number facing down. I’d suggest you fold the wings in and the pocket up first, then glue the pocket to the wings after. (In case you fold it a little less then straight first try, like someone might have during the creation of this project, not mentioning any names.) See the handy little gif below for help.
4) Check your dates and sort your events
I think the trick to sticking to an advent calendar is a little bit of date checking. Caroling, for example might be better received on the 23rd, rather then the 5th. You might see more Christmas lights on the 21st instead of the 2nd. And you probably don’t want to watch three Christmas movies in a row. (Ok, who wouldn’t, but you get the idea!) I looked at a calendar to see what event cards would work best where, and laid them out in a somewhat organized fashion before stuffing the envelopes.
5) Fold and fill the envelopes
You’re ready - you Christmas ninja you. Fold those little suckers and stuff away.
Notes:
- Remember if you want to use your own calendar, just print pages 9-11 to print the event cards only.
- As always, if you try this project I'd love to see your result! Please share a pic and tag us on instagram, @somanyhoorays #naileditsomanyhoorays or on the So Many Hoorays facebook page


